| Indice |
|
[1] Welcome [2] The Deskbar [3] The window widgets [4] The shortcut key [5] The Twitcher [6] The Team monitor [7] Window management: Move & Resize [8] Window management: Stack [9] Window management: Tile [10] Workspaces [11] Replicants [12] Single window navigation [13] Drill-down navigation [14] Mounting volumes [15] Filesystem layout [16] Finding files with queries [17] Wireless connection [18] Getting more and updating software [19] The end |
Benvenuto nella guida rapida ad Haiku
Per quanto Haiku condivida molti aspetti con altri sistemi operativi, ha un approccio, talvolta, unico in alcune aree che ha senso approfondire. In queste poche slide, imparerai le caratteristiche più importanti e le peculiarità di Haiku che ti consentiranno di cominciare velocemente ad utilizzarlo.
For each topic you can find a box with links for "further reading" that point to additional resources, like related topics in the User Guide.
La Deskbar
| Per approfondire |
| Deskbar |
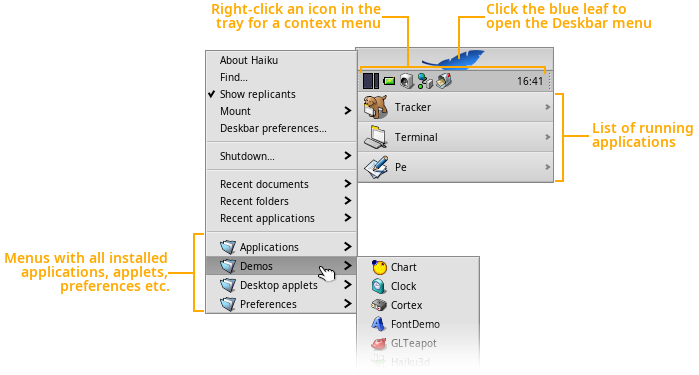
Collocata, per impostazioni predefinite, sull'angolo in alto a destra della Scrivania, la Deskbar è il punto di partenza per interagire con Haiku. Puoi usarla per avviare applicazioni, applet o pannelli di preferenze, per esempio, e per passare da un'applicazione a un'altra.
I controlli delle finestre
| Per approfondire |
| L'interfaccia utente di Haiku |
Questa è una tipica finestra di Haiku con i suoi controlli:

Il tasto di scelta rapida
| Per approfondire |
| Scorciatoie e combinazioni di tasti |
Il pannello di preferenze Mappa Caratteri consente di passare al tasto predefinito di Haiku ALT al CTRL (come in Windows/Linux). Questa opzione è applicata globalmente, infatti, ad esempio, per chiudere un processo a riga di comando bisognerà usare ALT C invece del tipico CTRL C.
Questa inconsistenza è il motivo principale per cui il tasto ALT è quello predefinito in Haiku.

Il Twitcher
| Per approfondire |
| Twitcher |
Tenendo premuto CTRL TAB causerà l'apparizione del Twitcher che consente d passare da un'applicazion a un'altra.
Premendo ripetutamente TAB continuando a tenere premuto CTRL causerà il passaggio all'ultima applicazione utilizzata.

Il Team monitor
| Per approfondire |
| Team monitor |
Se un'applicazione va malamente in errore e non scompare dalla lista delle applicazioni in esecuzione sulla Deskbar, premi CTRL ALT DEL per invocare il Team monitor. Qui puoi cercare un'applicazione per forzarne l'arresto.
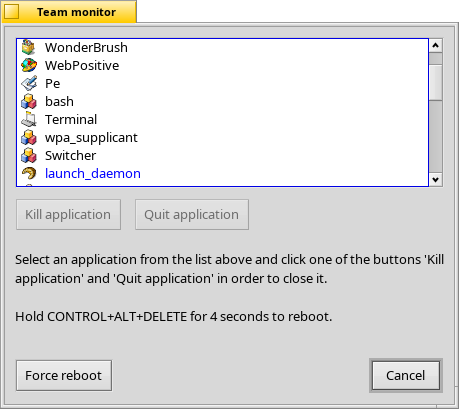
Un modo molto pratico per sbarazzarsi di un'applicazione in errore che è rimasta sulla Deskbar è la Presa Mortale Vulcaniana.
Tieni premuto SHIFT CTRL ALT e click sull'applicazione in Deskbar. Bang!
Gestione delle finestre: Sposta & Ridimensiona
| Per approfondire |
| Un modo veloce per spostare e ridimensionare le finestre |
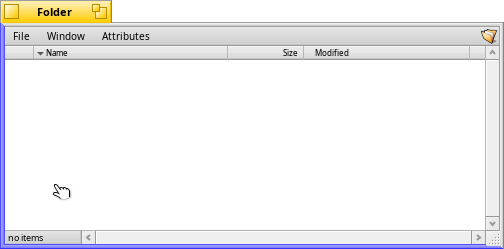
Haiku mette a disposizione una modalitàm olto elegante per muovere o ridimensionare velocemente le finestre:
Tenendo premuto CTRL ALT verranno evidenziati i bordi della finestra più vicini al puntatore del mouse.
Clicca e trascina con il pulsante destro del mouse per ridimensionare la finestra sui bordi selezionati.
Clicca e trascina con il pulsante sinistro per spostarla.
Gestione delle finestre: Stack (Impila)
| Per approfondire |
| Stack & Tile |
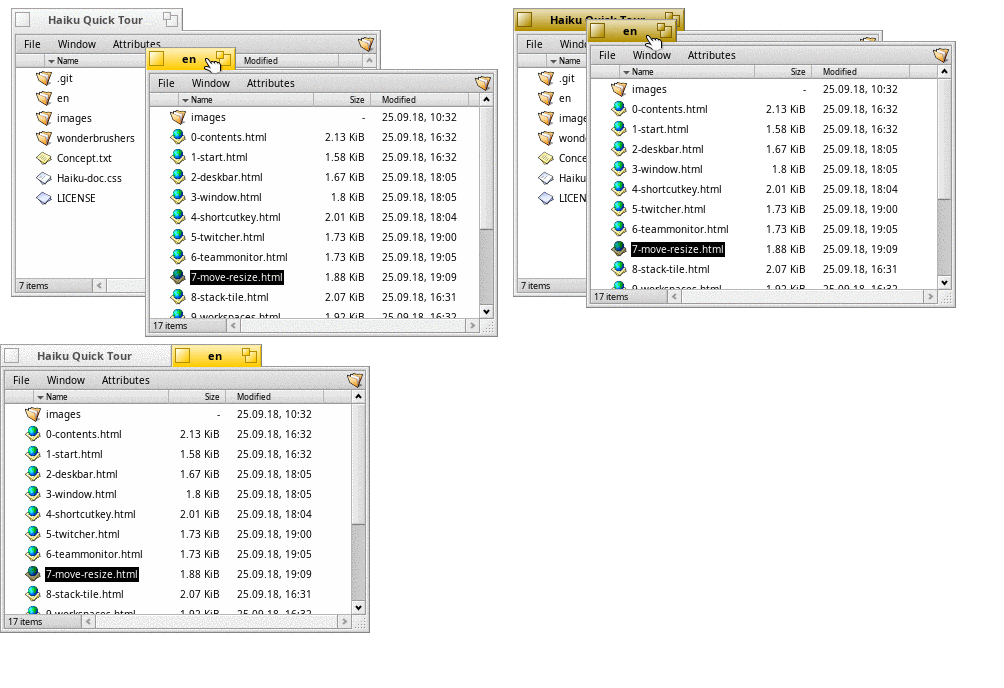
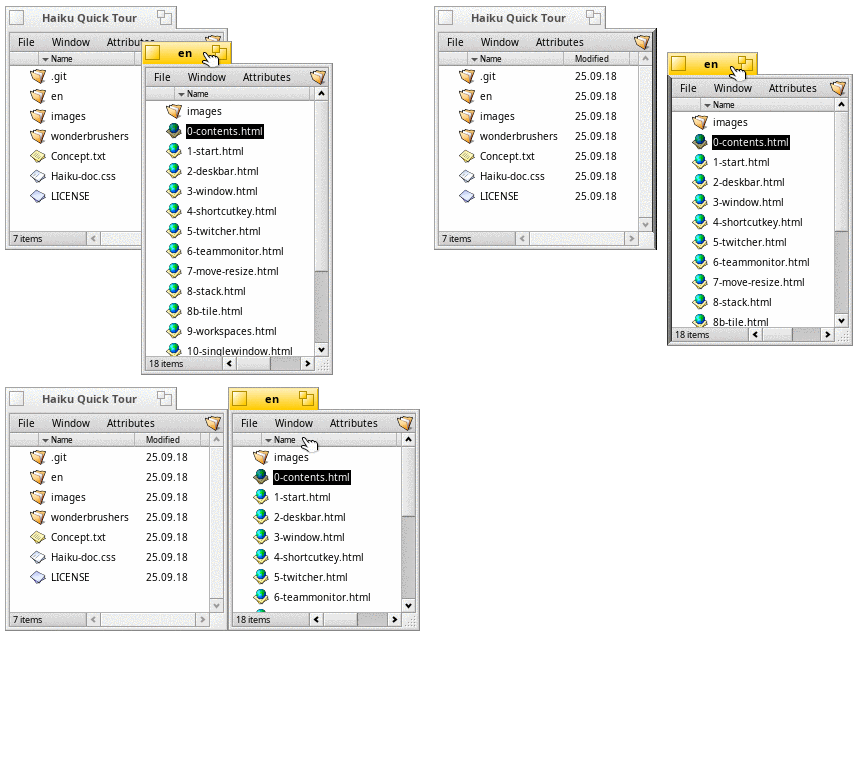
Per "impila" si intende disporre le fineste una sull'altra, in modo che le tab del titolo possano andare automaticamente in posizione.
Tenendo premuto il tasto OPT (che in genere sulla tastiera è il tasto WIN), le tab sovrapposte cambieranno di colore; lascia a questo punto il pulsante de mouse per impilare le finestre.
Puoi sganciare la finestra tenendo premuto OPT e trascinando la tab gialla fuori dal gruppo.
Gestione delle finestre: Tile (Affianca)
| Per approfondire |
| Stack & Tile |
Per "Affianca" si intende incollare insieme le finestre, orizzontalmente oppure verticalmente.
Tenendo premuto OPT, i bordi che saranno fusi insieme quando lasci la finestra cambieranno colore quando li avvicini.
Puoi separare le finestre tenendo premuto OPT e trascinando via la finestra dal gruppo tramite la sua tab gialla.
Gli spazi di lavoro
| Per approfondire |
|
Workspaces Screen |
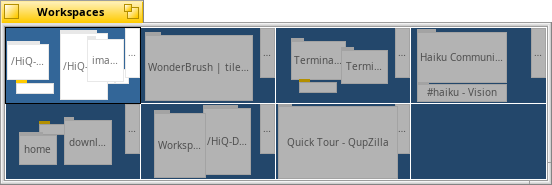
Workspaces are virtual desktops, complete with their own resolution, color depth and background.
Up to 32 of these workspaces can be set from the Screen preferences.
The Workspaces desktop applet can be used to change workspaces or to drag a window from one to another.
The quick keyboard shortcut to change workspaces is CTRL ALT ← / → / ↑ / ↓.
If you add SHIFT to that, the active window is taken with you to that workspace.
Replicants
| Per approfondire |
| Replicants |
Replicants are small self-contained parts of applications that can be integrated into the Desktop (and other programs).
Provided Deskbar's option to is activated, replicants are indicated by a small handle.
You can drag & drop them by the handle onto the Desktop, where they are fully functional without their parent app running.
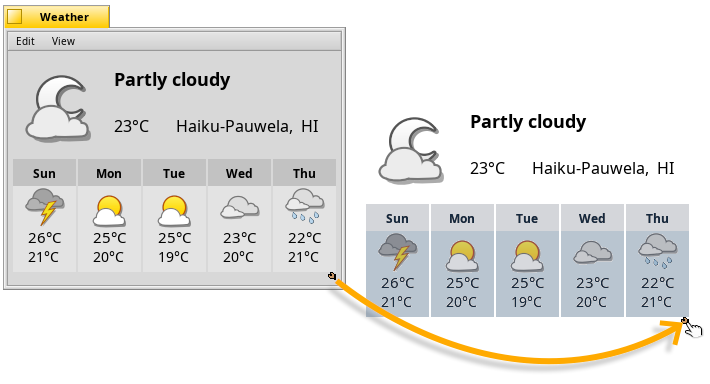
You can move a replicant by its handle and remove it with a right-click on it and choosing .
Single window navigation
| Per approfondire |
| Tracker |
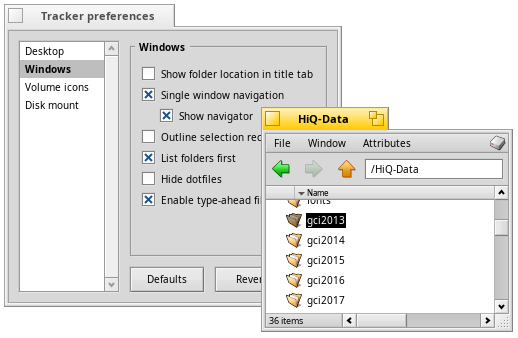
Double-clicking your way down folder after folder, you'll quickly end up with many open Tracker windows.
Holding the OPT key (normally WIN on the keyboard) prevents this as it automatically closes the parent folder.
Alternatively, you can activate from the Tracker preferences.
will add back/forward buttons.
Drill-down navigation
| Per approfondire |
| Tracker navigation |
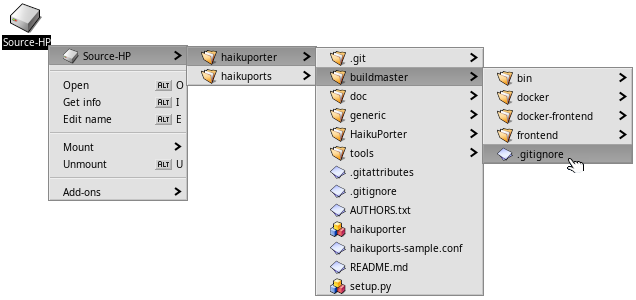
A nice alternative to opening a deep hierarchy of folders is called "drill-down navigation". Right-clicking a folder or anywhere in a Tracker window (or the Desktop) will open a context menu. Beside various expected commands, there's a menu of the current folder at the top that contains all its subfolders.
Drill your way down until you find the folder or file to open.
Mounting volumes
| Per approfondire |
| Mounting volumes |
In order to access a harddisk, CD, USB stick etc., you first have to mount the volume. Once mounted, its icon appears on the Desktop.
This is done with a right-click on the Desktop or an already mounted volume (like the boot disk) and choosing the volume from the submenu. You find the same menu in the Deskbar. ISO images can be mounted with a double-click.

Filesystem layout
| Per approfondire |
|
Filesystem layout Applications Directory structure |
While Haiku is currently not multi-user, there are already two branches in the filesystem tree:
 /boot/system/ | The system hierarchy contains system files and settings for all users. The package management makes most folders under /system effectively read-only. Packages contain all their files in a fixed folder hierarchy. Upon installation, a package gets "mounted" and all its files just appear to be in that hierarchy in the /system folder. The folders there (like add-ons, apps, bin etc.) are just a virtual amalgamation of all the installed packages and are therefore read-only. Exceptions are cache, non-packaged, settings, and var.
| |
 /boot/home/ | The home hierarchy is your personal folder where you keep your data and settings. The folder /boot/home/config (or shortened ~/config) mirrors the /system folder described above and is likewise virtually read-only with the same exceptions of cache, non-packaged, settings, and var.
|
The writable non-packaged folders mirror the hierarchy of the /system or ~/config/ hierarchy (add-ons, apps, bin…).
Software that doesn't come in form of a HPKG package can be installed here.
Finding files with queries
| Per approfondire |
|
Queries Filetypes, Attributes, Index and Queries |
Files on Haiku formatted (BFS) volumes are quickly searched with from the Deskbar. Instead of file and folder names, you can also look through filetype specific attributes, e.g. for an artist in your MP3 collection.

Wireless connection
| Per approfondire |
|
Wireless networking NetworkStatus Network preferences |
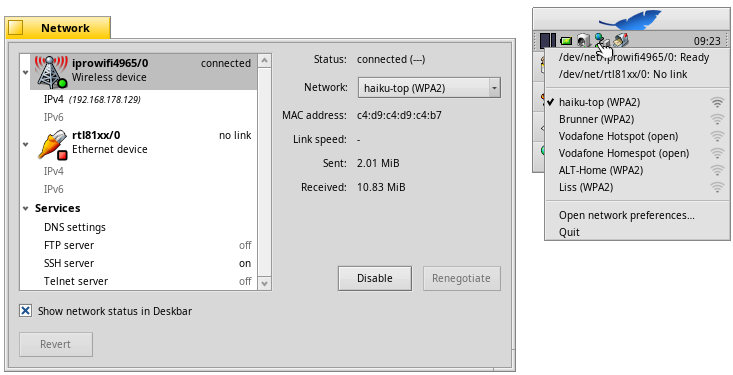
You can connect to your WLAN router either by right-clicking the NetworkStatus icon in Deskbar's tray,
or by selecting your network from the Network preferences.
When the connection is established, you'll be asked for the network's encryption and password.
Getting more and updating software
| Per approfondire |
|
HaikuDepot SoftwareUpdater Repositories |
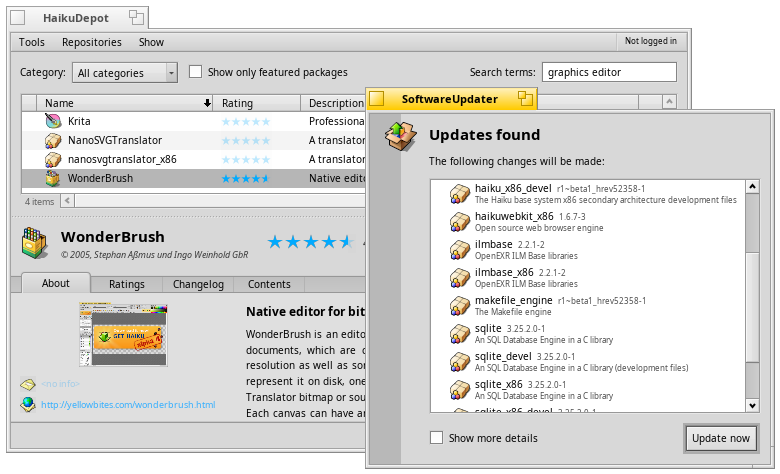
HaikuDepot from the Deskbar's applications menu is where to search, install and uninstall software packages.
Note, there are two tabs: Besides the limited number of , you can switch to see a list of (over 5,000 and counting).
SoftwareUpdater should be started from time to time to update installed software as well as Haiku itself.
Conclusioni
This is the end of the tour. We hope it helped you to quickly feel at home in your new OS!
For more detailed information, check out the Welcome page and the User Guide.
You can also join our Webforum and main IRC channel #haiku to get help or discuss your ideas.
The Haiku website has information how to get involved in driving Haiku forward. You can also make financial donations.
